
Integrate Address Validation to Your WordPress Formidable Forms.
Contact us if you get stuck. Drop by our developer chat page for in-depth assistance.

Installation
This integration works by hooking into Formidable Form's custom HTML functionality.
If you need support, you can either reach out to us on our support page or drop by our developer chat page.
Create Address Inputs
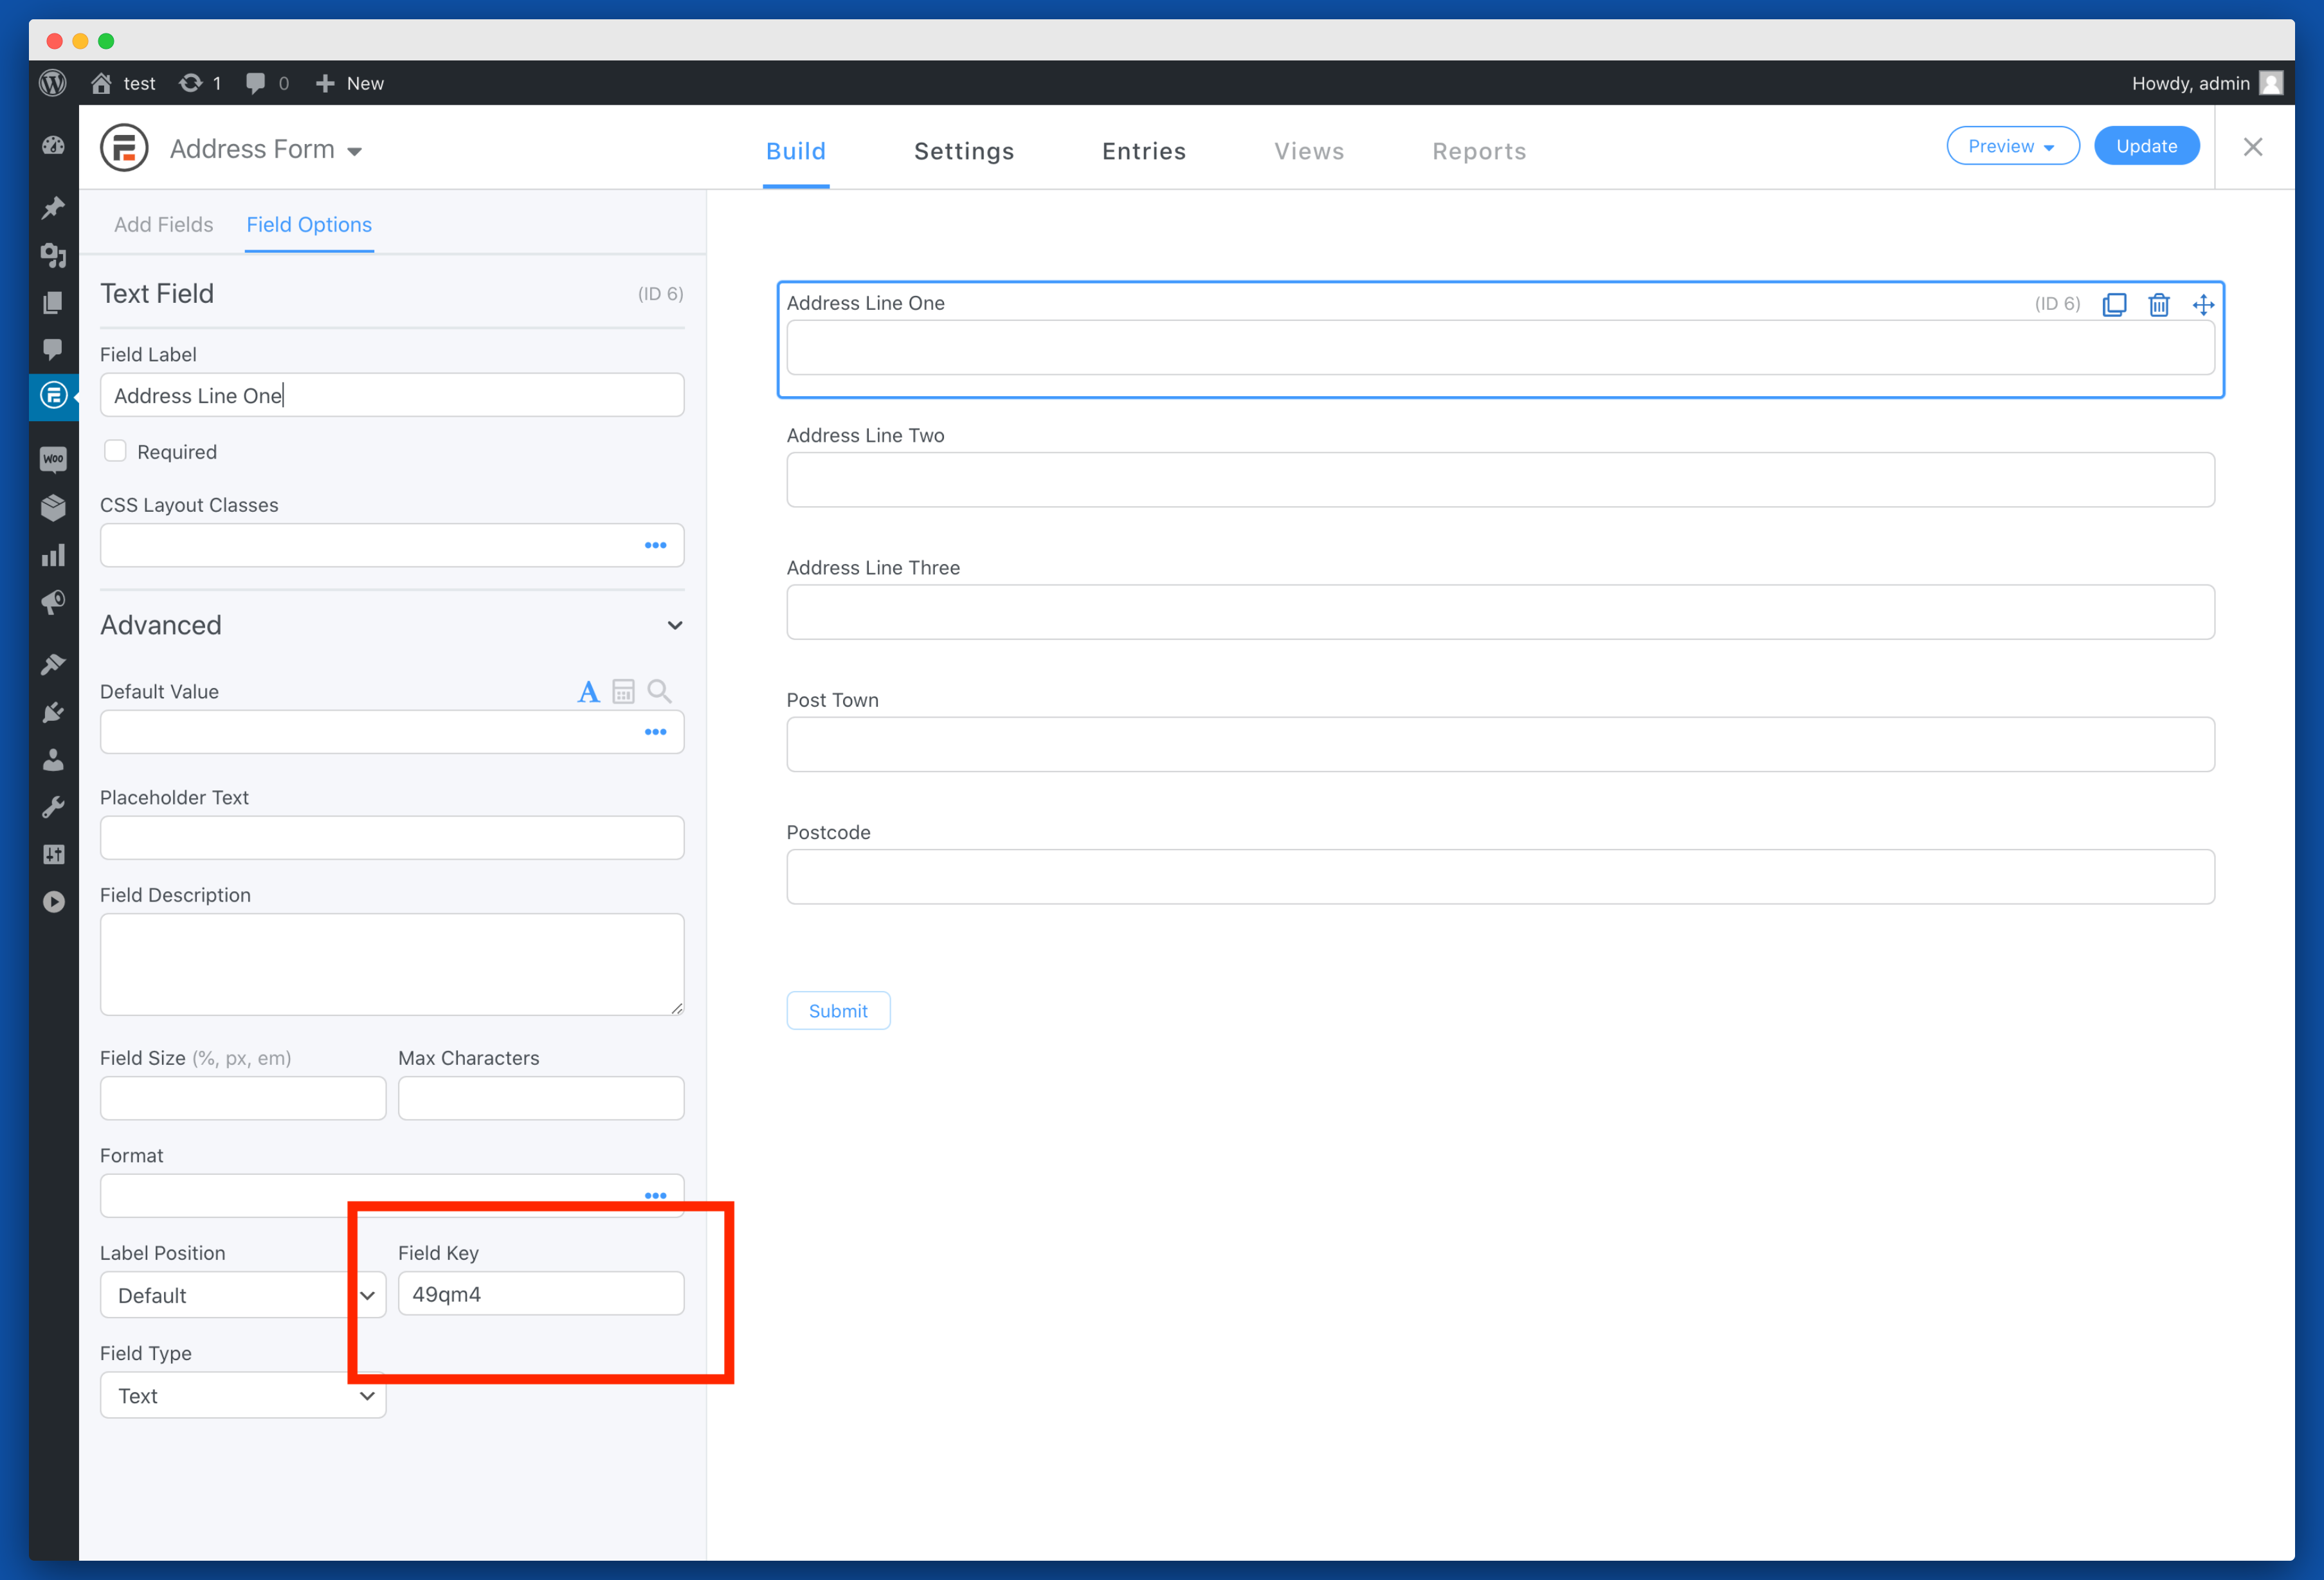
Add address input fields to your form. A basic address form to capture a correct UK address requires the following fields:
- Address line one
- Address line two
- Address line three
- Post town
- Postcode
You can optionally include additional fields, which are documented in the PAF data documentation.
Note the Field Keys under the Advanced tab of the left sidebar. You will need this later to configure Address Finder.
Add Address Finder
Navigate to the Custom HTML setting by clicking on the Settings tab, then Customize HTML in the left sidebar and scroll to After Fields. It is in the After Fields section where the Address Finder is loaded and initialised.
Add the following Script Tag to load and initialise Address Finder.
<script src="https://cdn.jsdelivr.net/npm/@ideal-postcodes/address-finder-bundled@4">
</script>

<script>
  document.addEventListener("DOMContentLoaded", function() {
    IdealPostcodes.AddressFinder.setup({
      apiKey: "Your Key",
      outputFields: {
        line_1: "#field_49qm4",
        line_2: "#field_sdg3d",
        line_3: "#field_14ydv",
        post_town: "#field_5yzek",
        postcode: "#field_xaiqo"
      }
    });
  });
</script>

Special care is required to:
- Update the
apiKeyattribute with the API Key from your account. Your API Key typically begins withak_ - Update the
outputFieldsattribute with theField Keystied to your form inputs - Update the
inputFieldattribute with theField Keyfor the first line of your address form
Your API Key is required to authenticate your form with your Ideal Postcodes account.
When inserting Field Keys, they must be prepending with #field_. So if your first address line Field Key is 49qm4, the line_1 parameter is #field_49qm4.
The outputFields parameter tells the plugin where to send address fragments like first line, postcode, etc. Your input fields are identified by IDs which look like #field_XXXXX.
The inputField parameter tells the plugin where the Address Finder box should appear. Typically, this is the same as your line_1 parameter
If you wish to add an additional field, include the parameter name from our documentation. For instance, adding a county field with Field Key abcde will look like:
IdealPostcodes.AddressFinder.setup({
  apiKey: "Your Key",
  outputFields: {
    line_1: "#field_49qm4",
    line_2: "#field_sdg3d",
    line_3: "#field_14ydv",
    post_town: "#field_5yzek",
    postcode: "#field_xaiqo",
    county: "#field_abcde"
  }
});
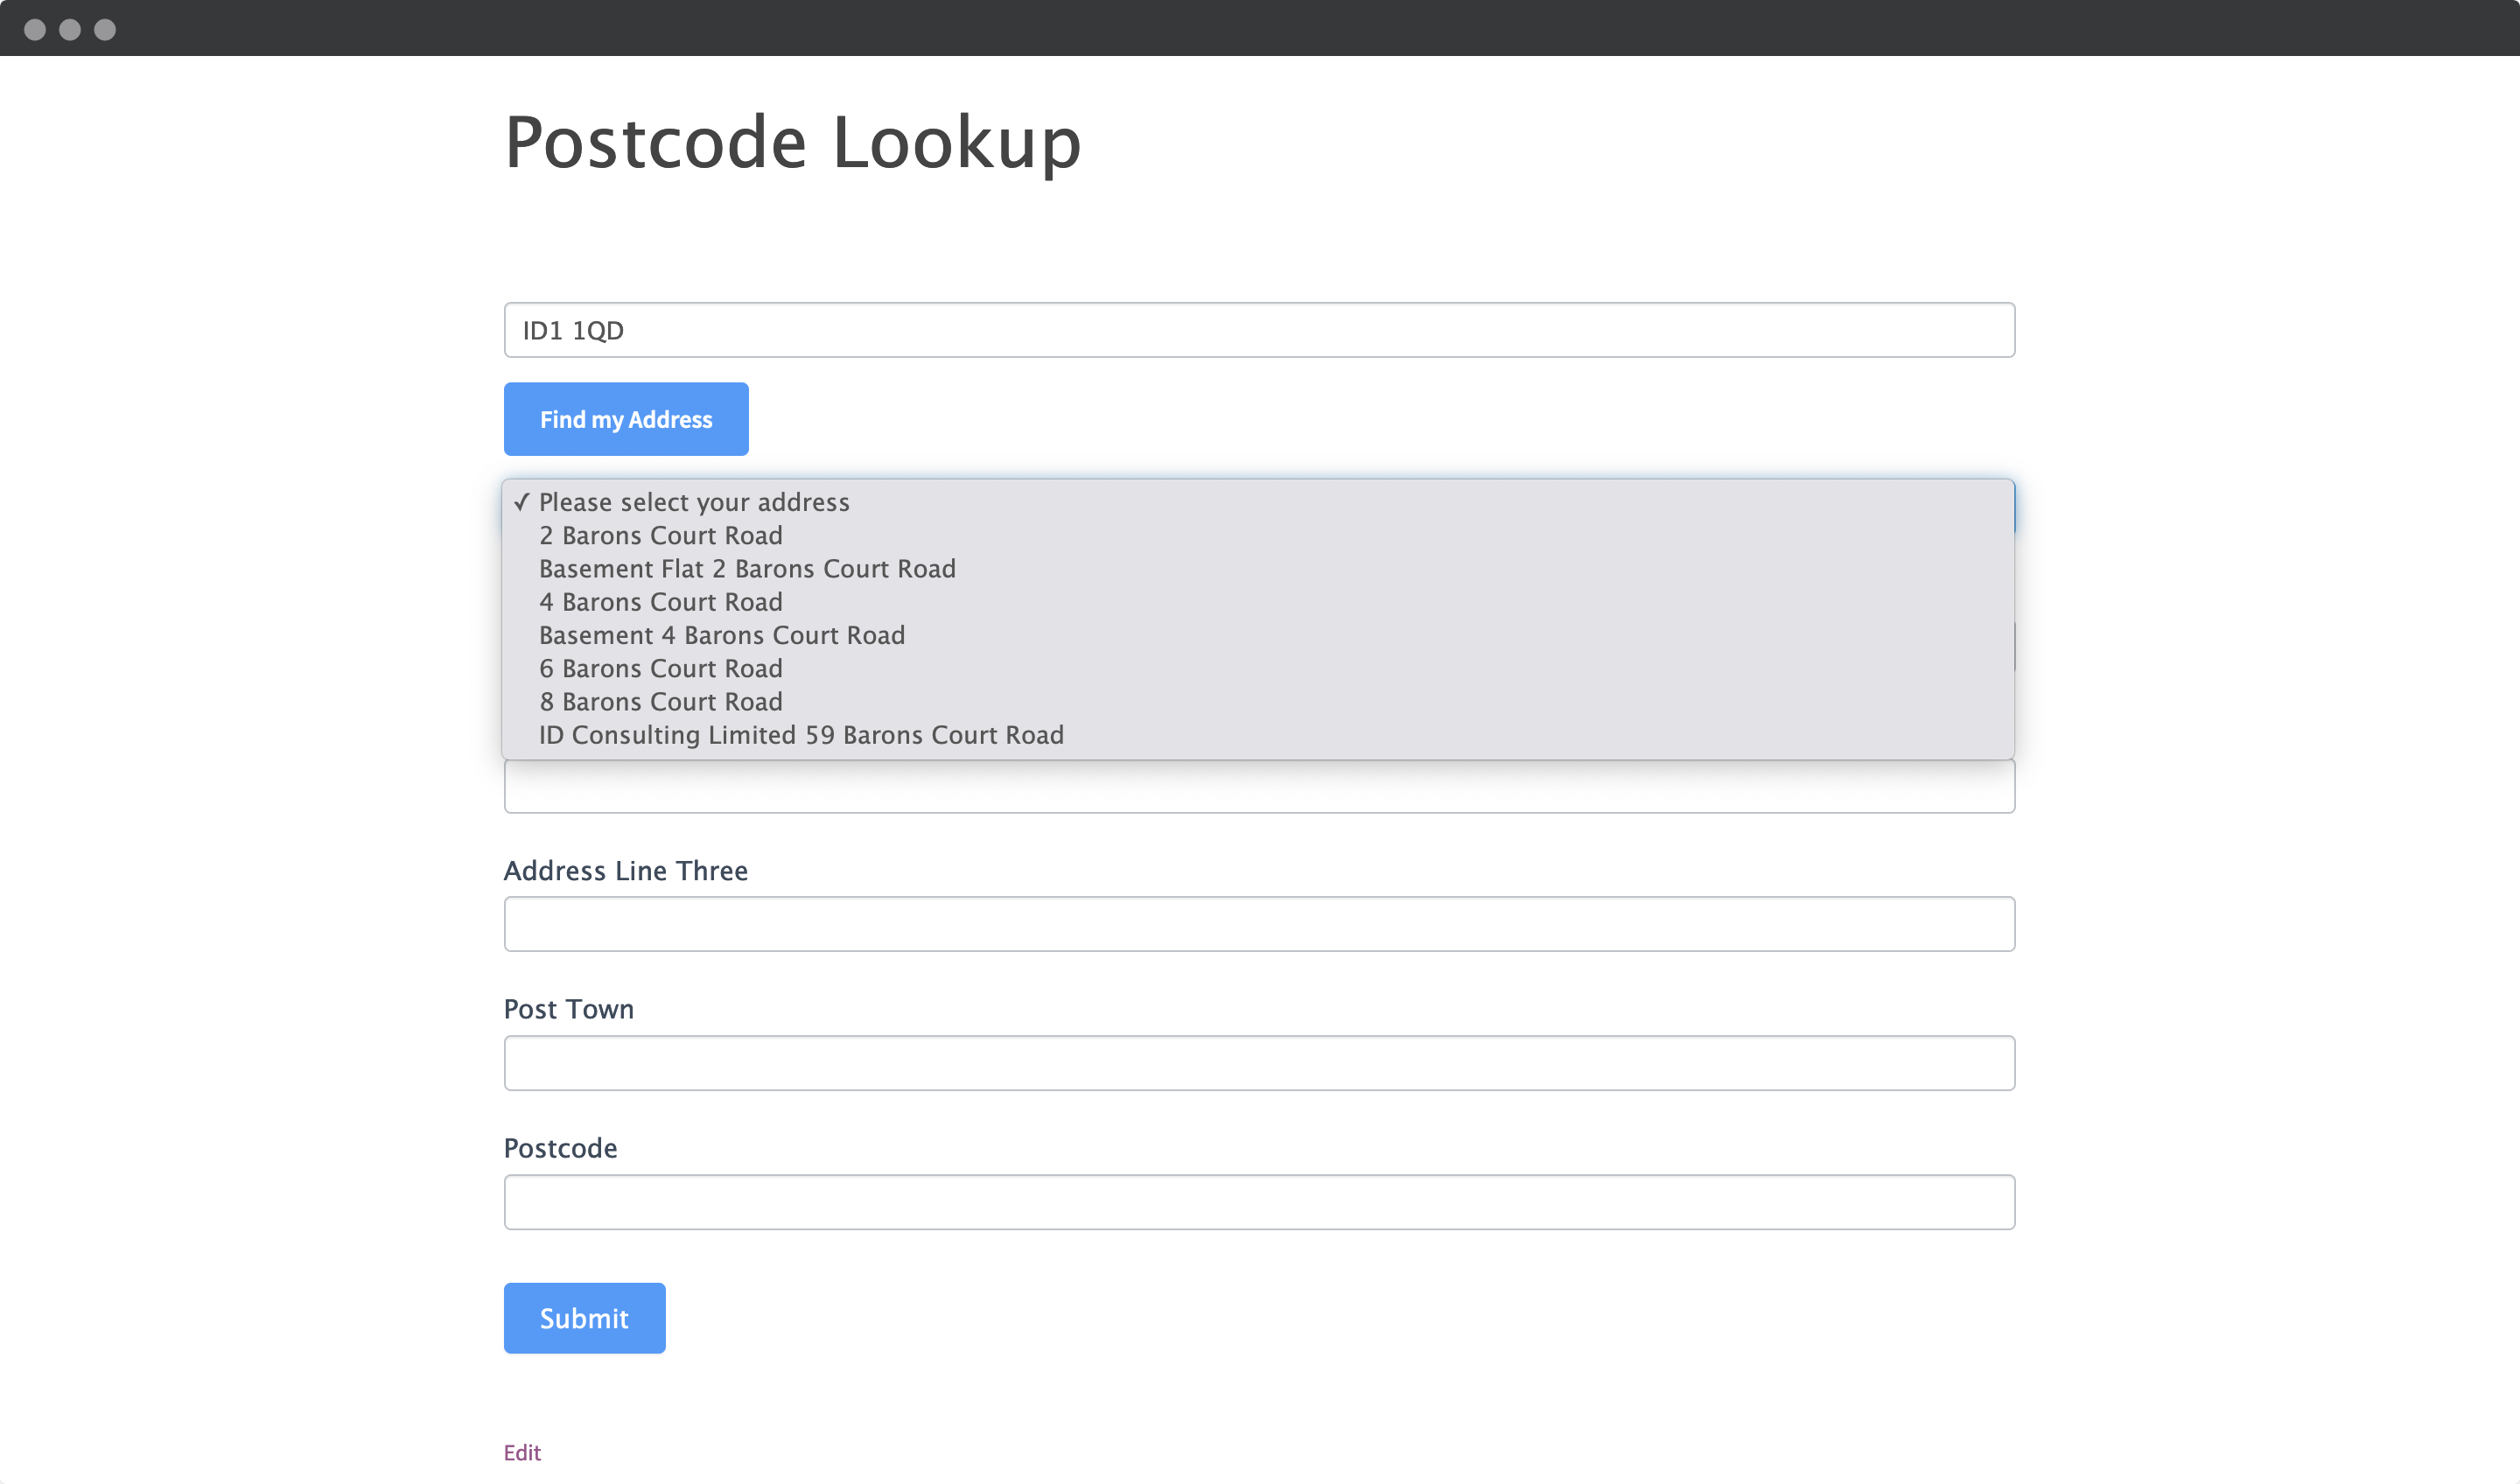
Add Postcode Lookup
1. Add Postcode Lookup HTML Element
Create a HTML Field above your first address field to scaffold your postcode search field, search button and address dropdown for the plugin.
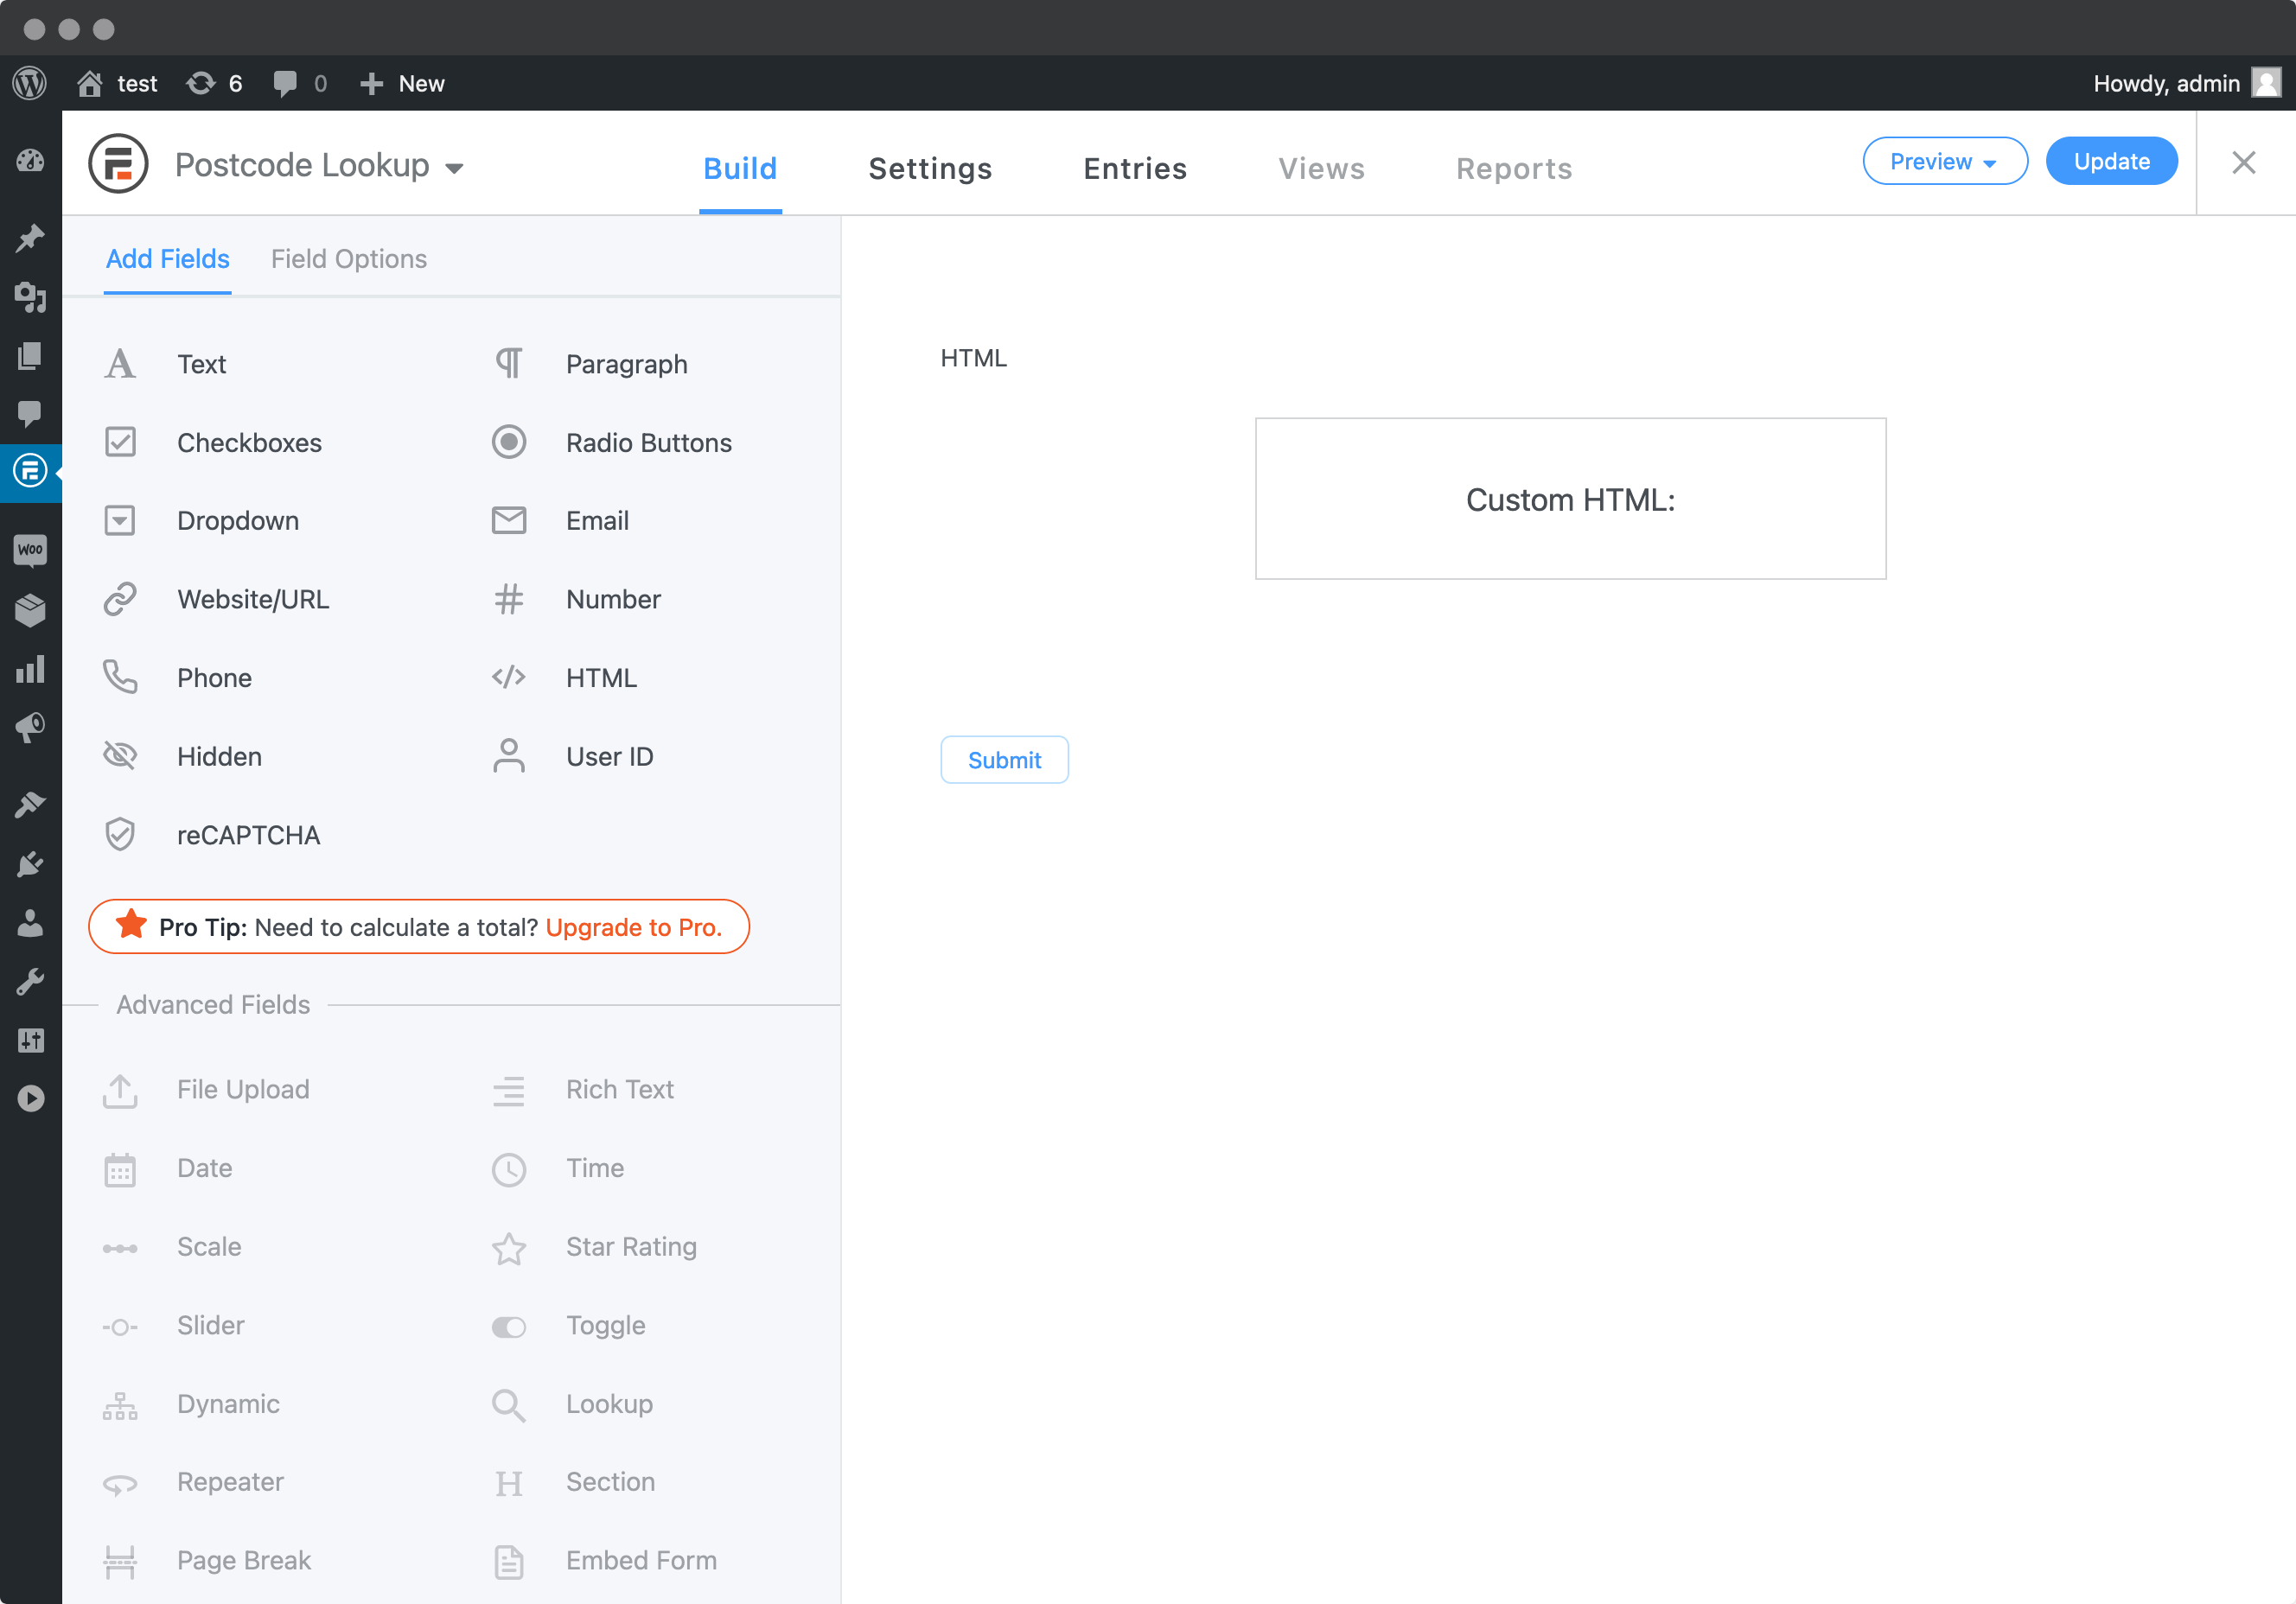
To do this, on the Add Fields section, click on HTML and insert the following in the Content box:
<div id="lookup_field"></div>
2. Load and Configure Postcode Lookup Plugin
Navigate to the Custom HTML setting by clicking on the Settings tab, then Customize HTML in the left sidebar and scroll to After Fields. It is in the After Fields section where the Address Finder is loaded and initialised.
Add the following Script Tag to load and initialise Address Finder.
<script
  src="https://cdn.jsdelivr.net/npm/@ideal-postcodes/postcode-lookup-bundled@2">
</script>

<script>
  document.addEventListener("DOMContentLoaded", function () {
    IdealPostcodes.PostcodeLookup.setup({
      apiKey: "ak_test",
      context: "#lookup_field",
      outputFields: {
        line_1: '#field_z9ghk',
        line_2: '#field_j0ep',
        line_3: '#field_jmuiw',
        post_town: '#field_qgsnb',
        postcode: '#field_h2n4z'
      },
      buttonClass: "lookup-button",
    });
  });
</script>
You may also style components of the Postcode Lookup field, e.g. for the button, you can assign it a CSS class selector. In the example above, we added the buttonClass attribute to the initialistion code, with a class name of lookup-button.
To style the button, you may place a style tag in the After Scipt Box. Place it before the Postcode Lookup initialisation code.
<style>
    .lookup-button {
        background-color: #579AF6;
        border: 1px solid #579AF6;
        border-radius: 4px;
        color: #fff;
        margin: 1em 0;
    }
</style>
Special care is required to:
- Update the
apiKeyattribute with the API Key from your account. Your API Key typically begins withak_ - Update the
outputFieldsattribute with theField Keystied to your form inputs - Update the
contextattribute with theidused in the HTMLdivelement created in step 1.
Your API Key is required to authenticate your form with your Ideal Postcodes account.
When inserting Field Keys, they must be prepending with #field_. So if your first address line Field Key is 49qm4, the line_1 parameter is #field_49qm4.
The outputFields parameter tells the plugin where to send address fragments like first line, postcode, etc. Your input fields are identified by IDs which look like #field_XXXXX.
The inputField parameter tells the plugin where the Address Finder box should appear. Typically, this is the same as your line_1 parameter
If you wish to add an additional field, include the parameter name from our documentation. For instance, adding a county field with Field Key abcde will look like:
IdealPostcodes.PostcodeLookup.setup({
  apiKey: "ak_test",
  context: "#lookup_field",
  outputFields: {
    line_1: '#field_z9ghk',
    line_2: '#field_j0ep',
    line_3: '#field_jmuiw',
    post_town: '#field_qgsnb',
    postcode: '#field_h2n4z',
    county: "#field_abcde"
  }
});
Configuration
See our Address Finder Plugin Documentation if you wish to customise Address Finder.
See our Postcode Lookup Plugin Documentation if you wish to customise Postcode Lookup.